
Ticket groups
Managing multiple ticket categories for your business can be a complex task, especially when you need to prioritize them for better visibility and organization. To help businesses address this challenge, we’ve introduced the ‘Ticket Groups’ feature. This tutorial will guide you through using ‘Ticket Groups’ effectively.
Why Use ‘Ticket Groups’?
Businesses with diverse ticket categories such as adults, kids, seniors, or various discounted tickets often need a way to group and prioritize ticket visibility. ‘Ticket Groups’ offer an organized method to display these ticket options to your customers, ensuring they find what they’re looking for easily and quickly.
Case Study: Riga Zoo’s Implementation
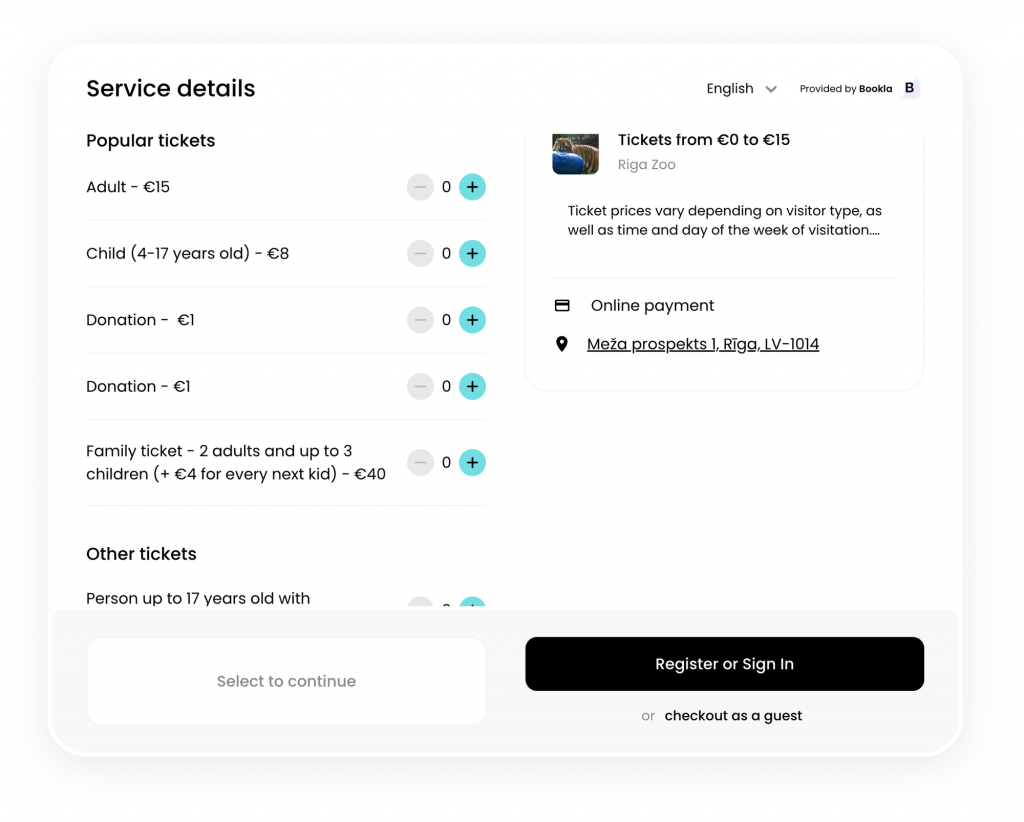
Before diving into the how-to, it’s helpful to understand the practical application. Riga Zoo, for instance, has adopted ‘Ticket Groups’ to categorize their ticket offerings on their website, providing a clear and user-friendly ticket selection process for their visitors. They’ve neatly divided tickets into two primary categories: ‘Popular tickets’ and ‘Other tickets’ to expedite the purchasing process. Moreover, to prominently highlight the opportunity for guests to contribute, they’ve introduced a “Donation” ticket and placed it within the “Popular tickets” category.
How to Set Up Ticket Groups
Let’s walk through the setup process on the Bookla portal:
- Start at the Service Tab: On the left menu, click on the ‘Services’ tab.
- Select or Create a Service: Either choose a service that already has tickets or create a new one.
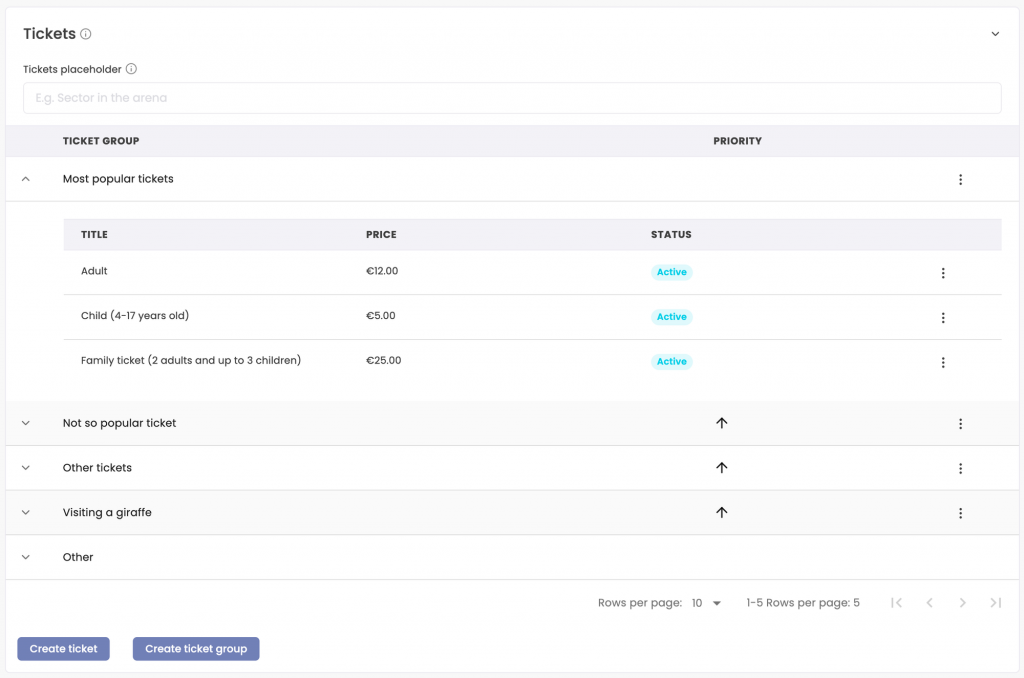
- Access Ticket Settings: Within the service, move to the ‘Settings’ tab and scroll to locate the ‘Tickets’ block.
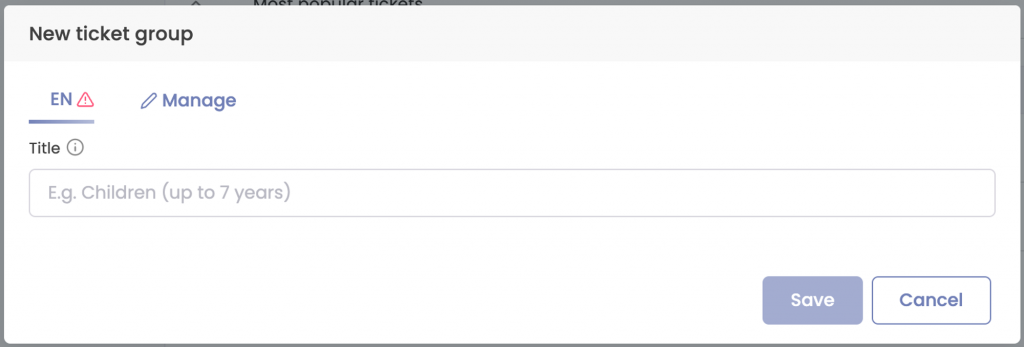
- Initiate Group Creation: Here, you’ll find the ‘Create ticket group’ button. Click it and provide a suitable name for your ticket group.
- Organize Multiple Groups: If you’ve created several groups, adjust their order using the arrow ↑.
How to Assign Tickets to Groups
With your groups ready, it’s time to place tickets into them:
- Select the Ticket: From the list of tickets, click on the one you wish to modify.
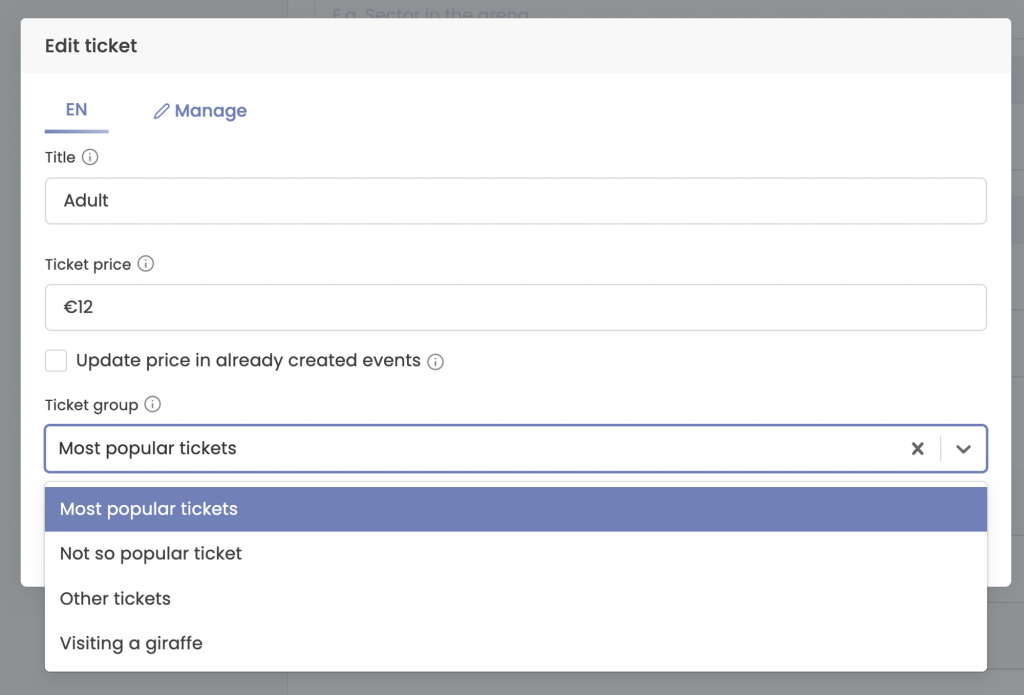
- Edit Ticket Group Assignment: An ‘Edit ticket’ popup will appear. Within this form, locate the ‘Ticket groups’ section.
- Assign and Save: Choose the group for this ticket and click ‘Save’.
Final Thoughts
Using the ‘Ticket Groups’ feature is a strategic move to improve the ticket selection experience for your customers. Organized displays save time and reduce potential confusion, ensuring that your users find the ticket options they need effortlessly. Continue exploring the Bookla platform for more features that can enhance your online reservation system.