How to create a calendar
Calendars help you handle bookings and arrange client meetings or events. To create a calendar, start by entering basic information like the title and type. Then, specify details such as title visibility and upload an image to activate the calendar. In the settings, provide additional information, like enabling in-app payments if needed. Finally, complete the process by activating the calendar after these steps.
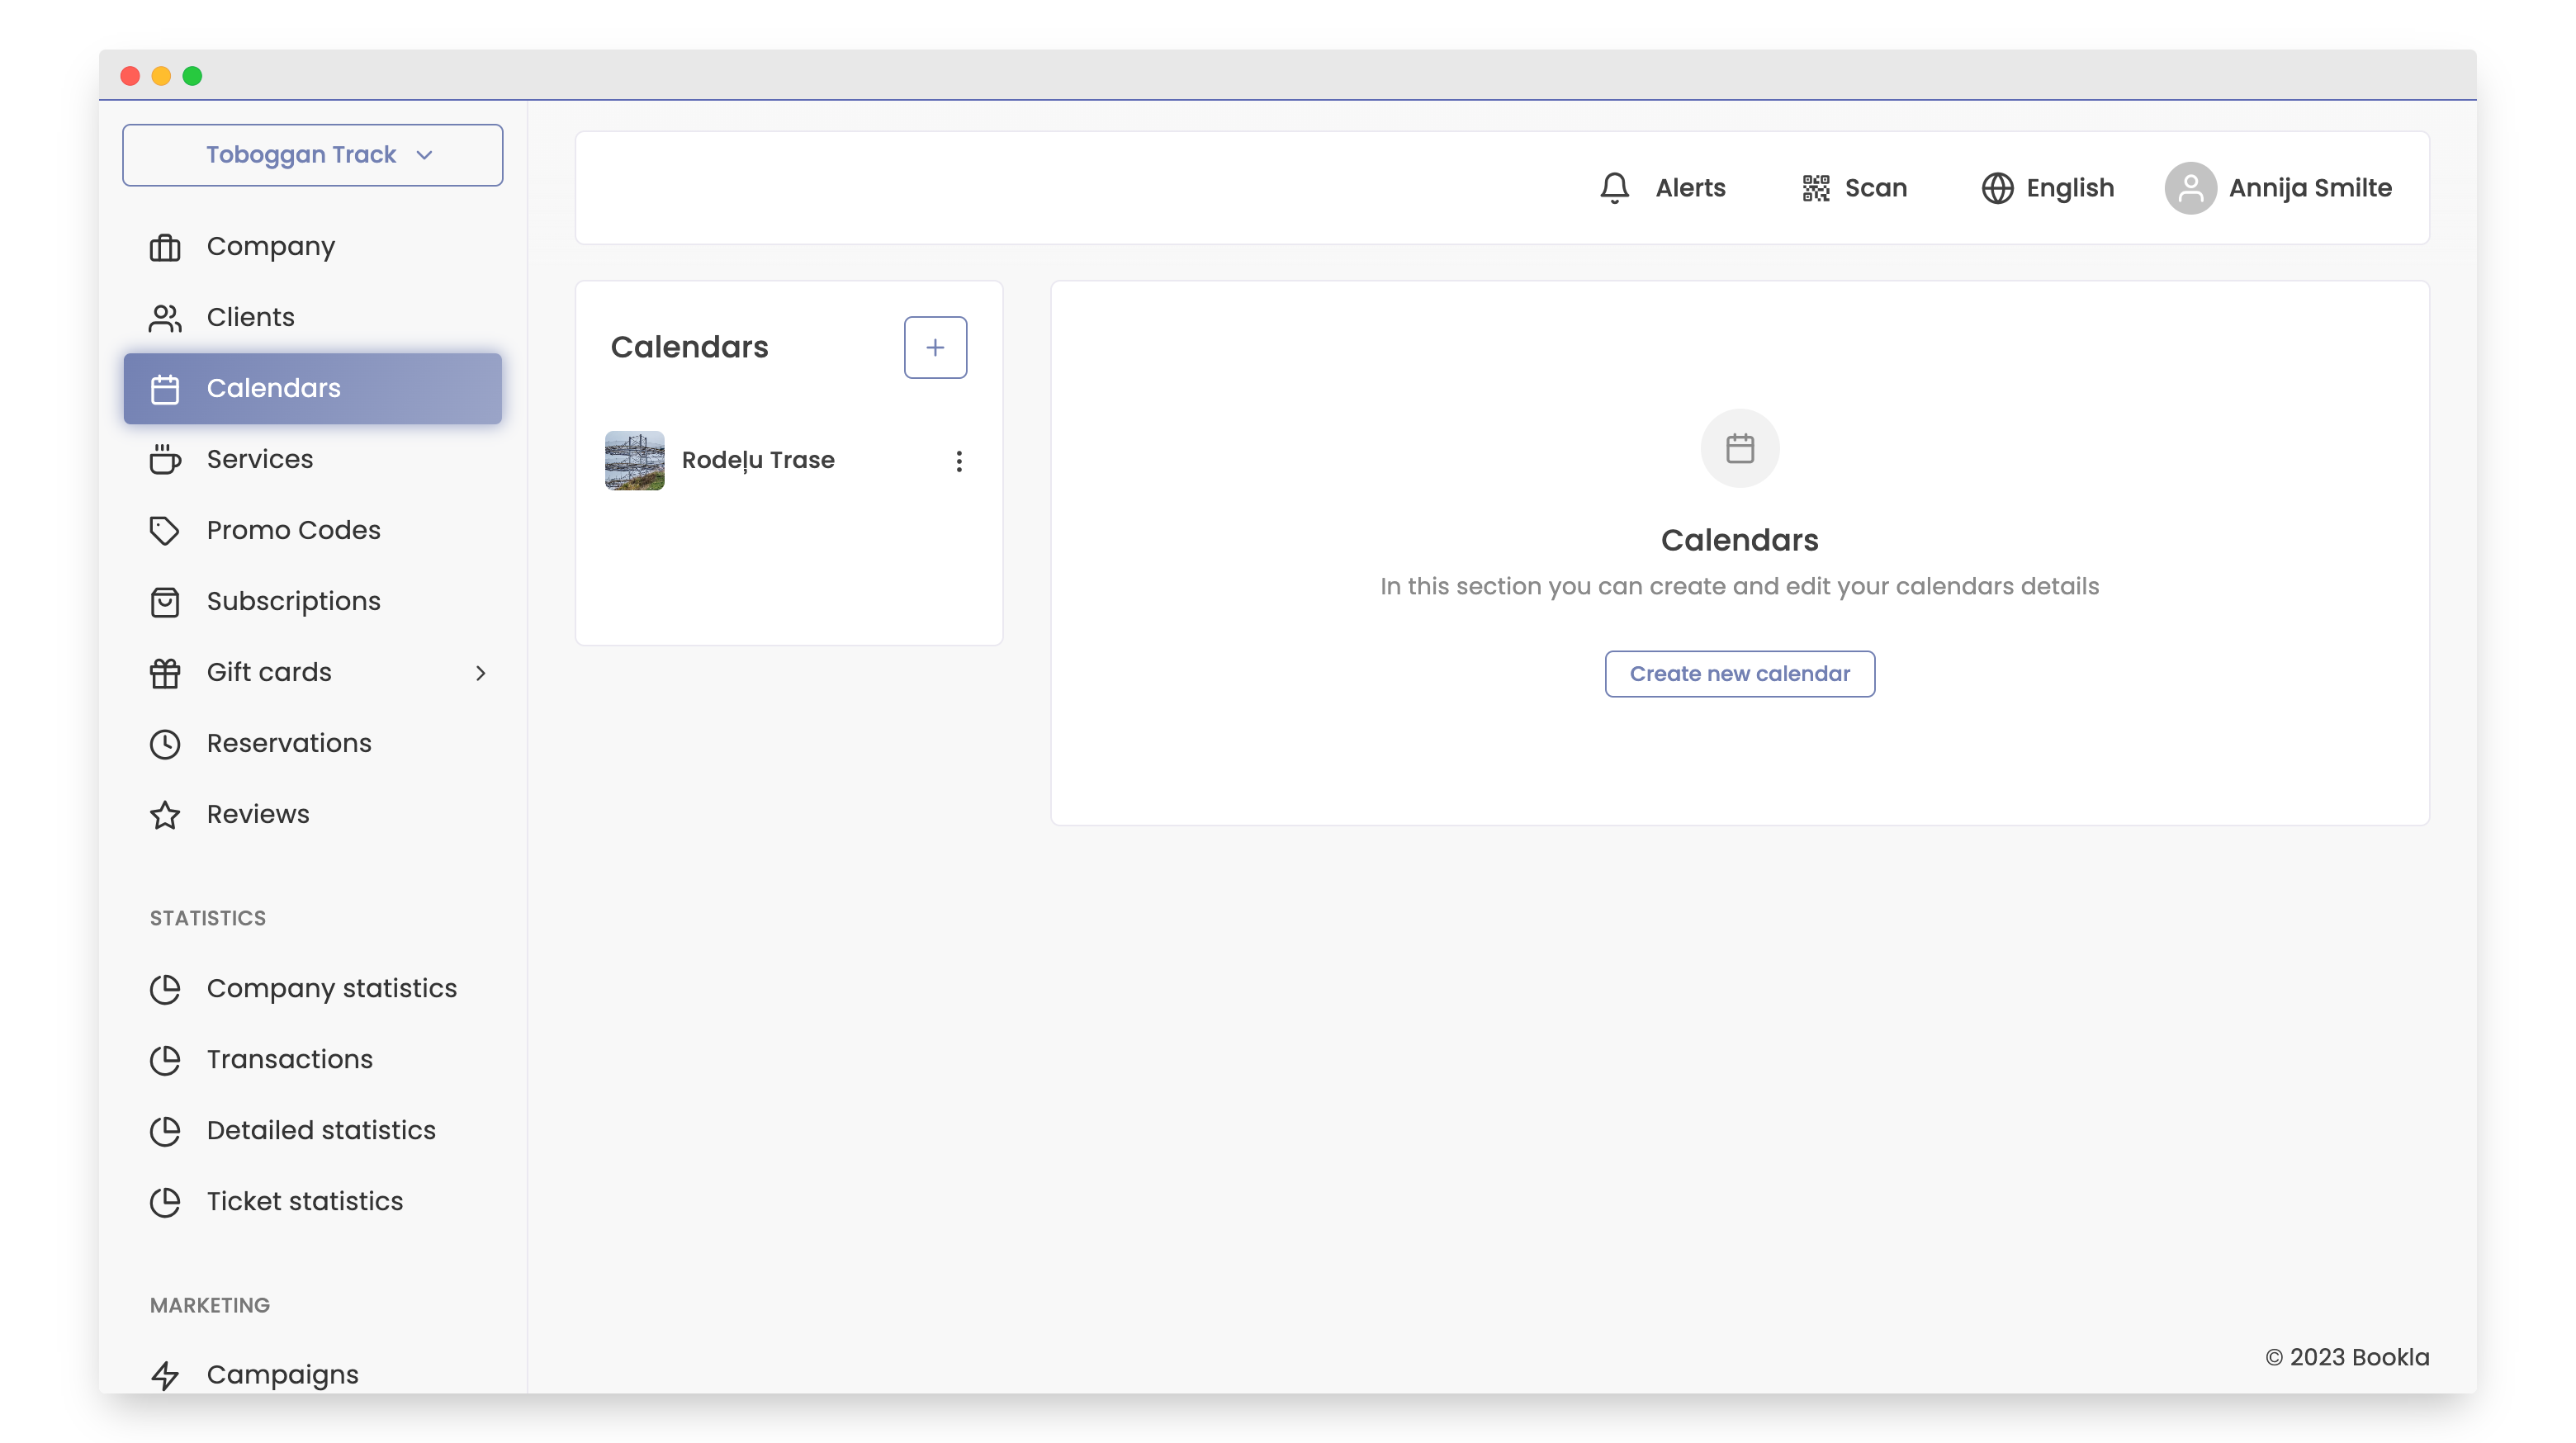
Create a calendar in Bookla:
- Open Bookla Portal
- Go to the "Calendars" section.
- Click on the "+" button or "Create a new calendar".
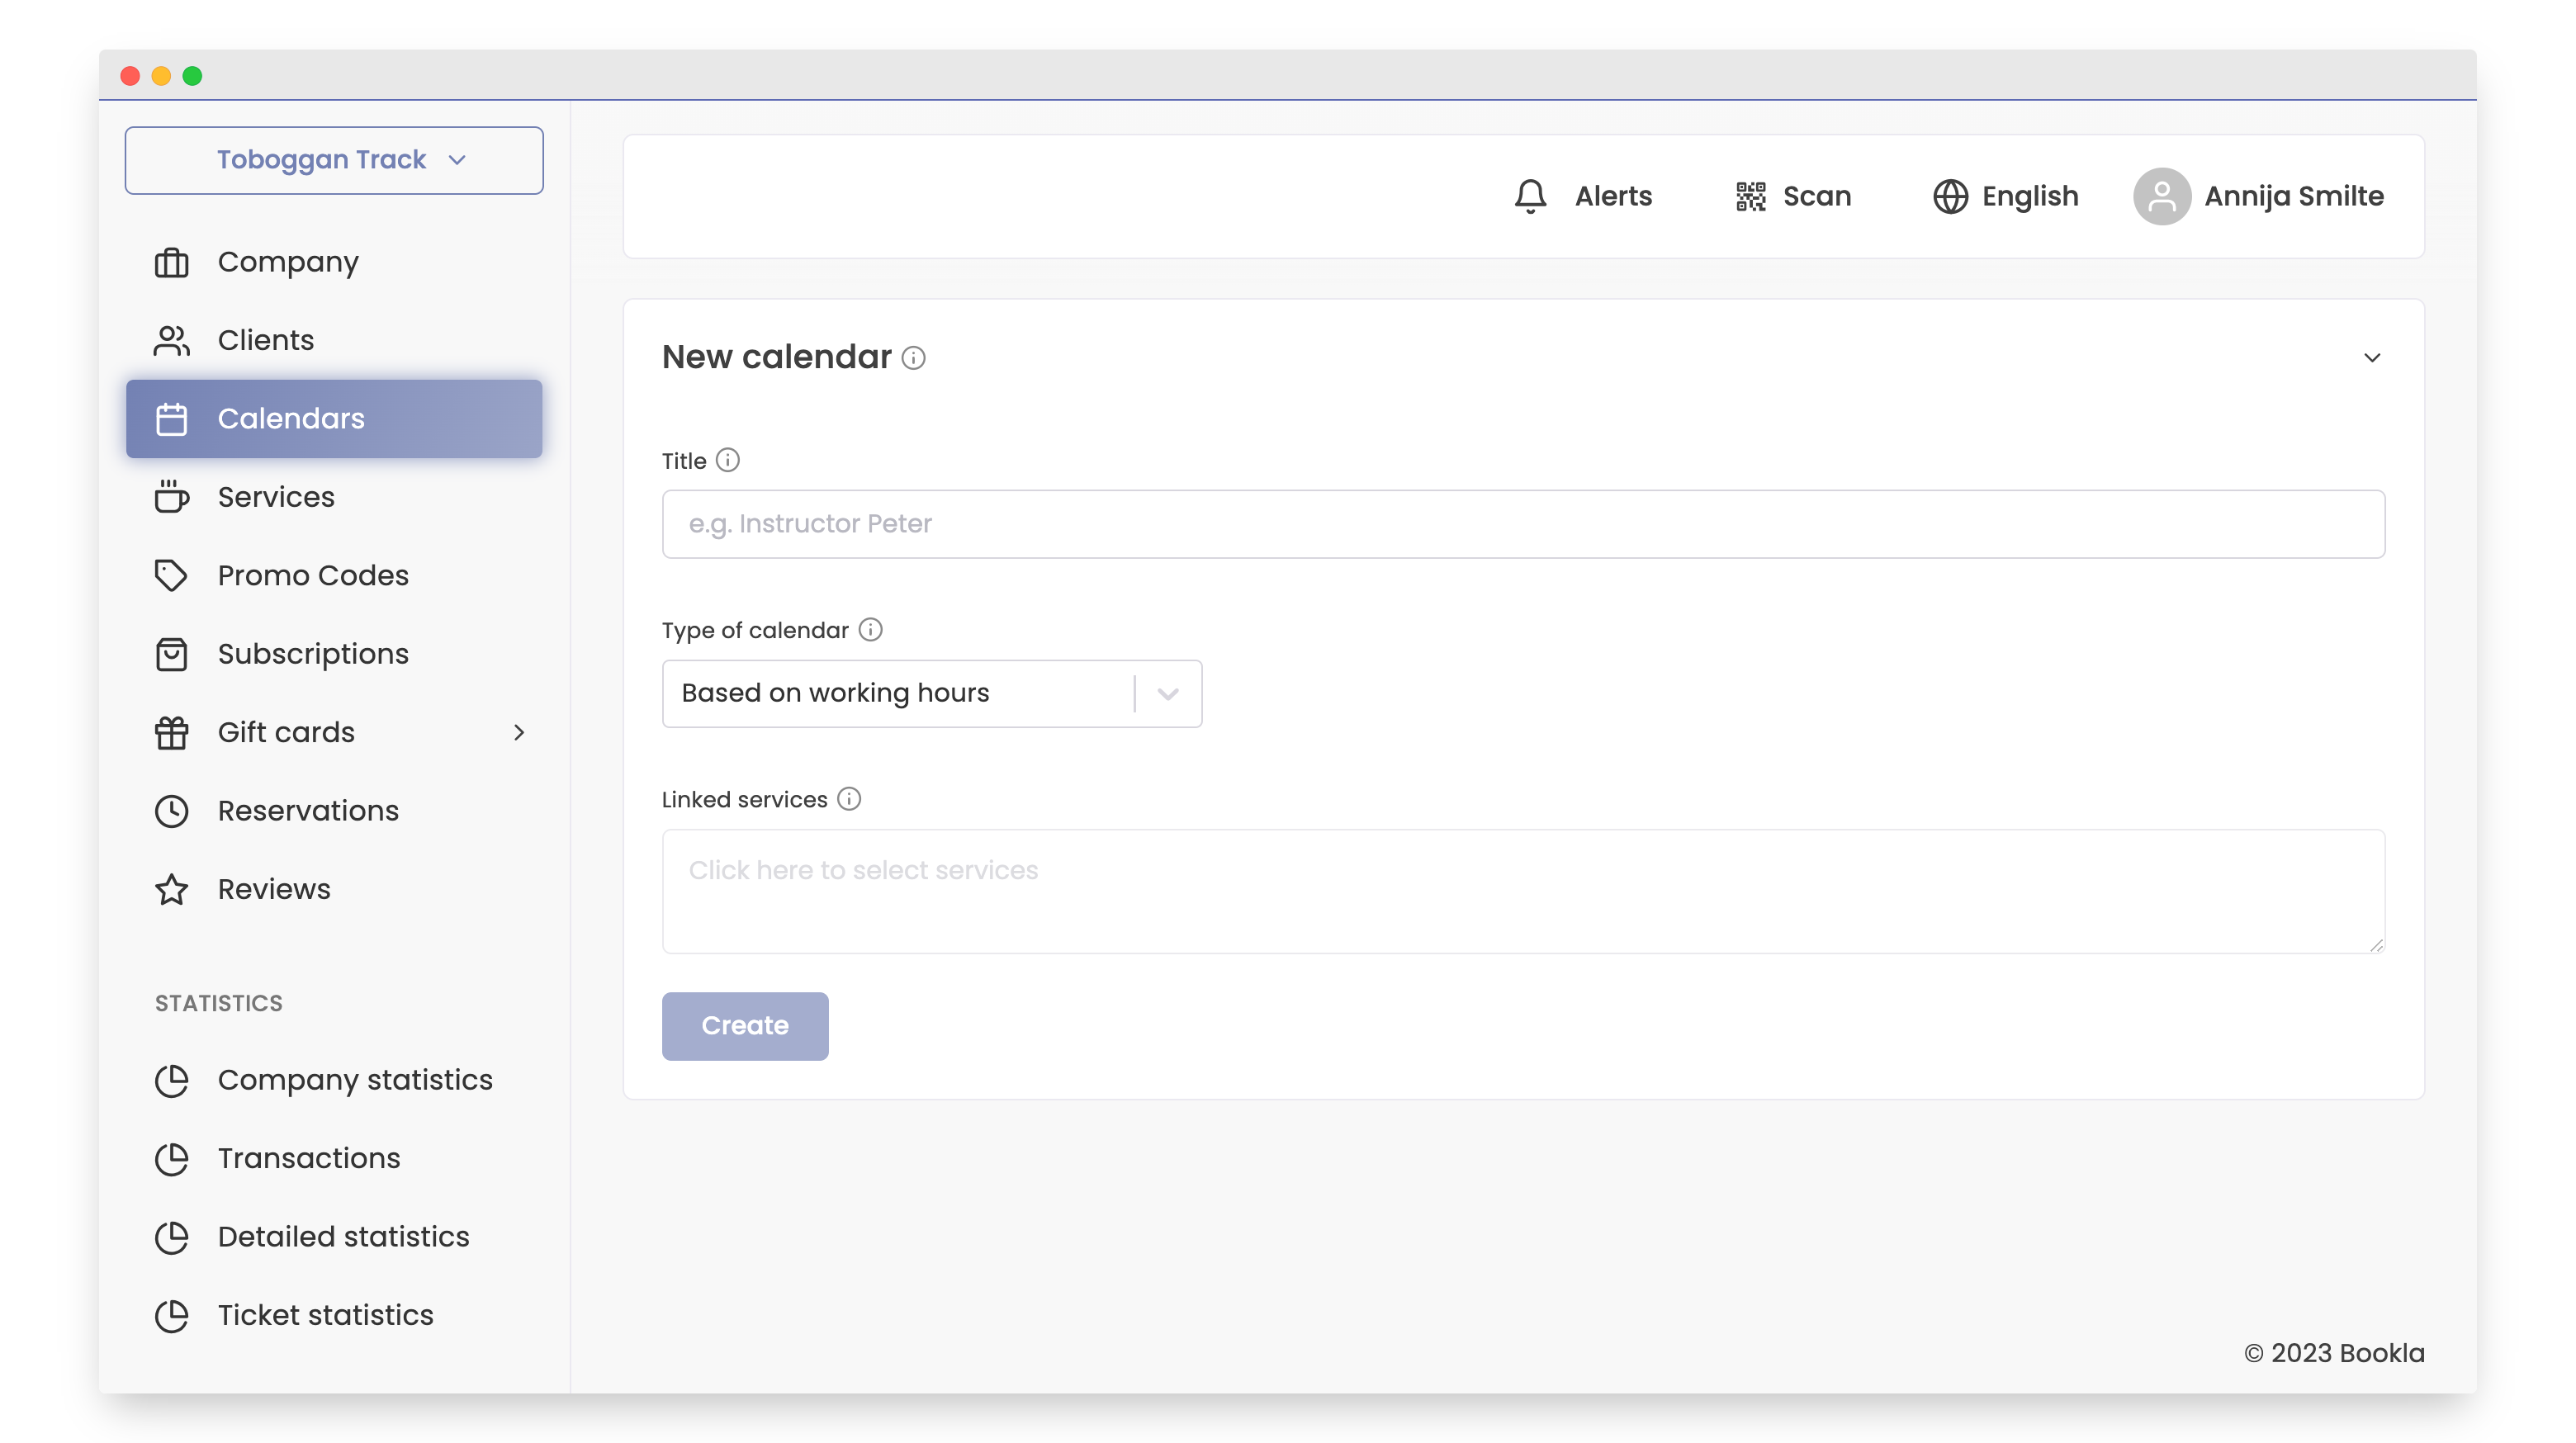
- Fill in the required fields:
- Title: Enter the calendar name.
- Calendar type: Choose the calendar type.
- Linked services (if applicable): If you already have a service created that you want to add to the calendar, select it.
- Click on "Create".
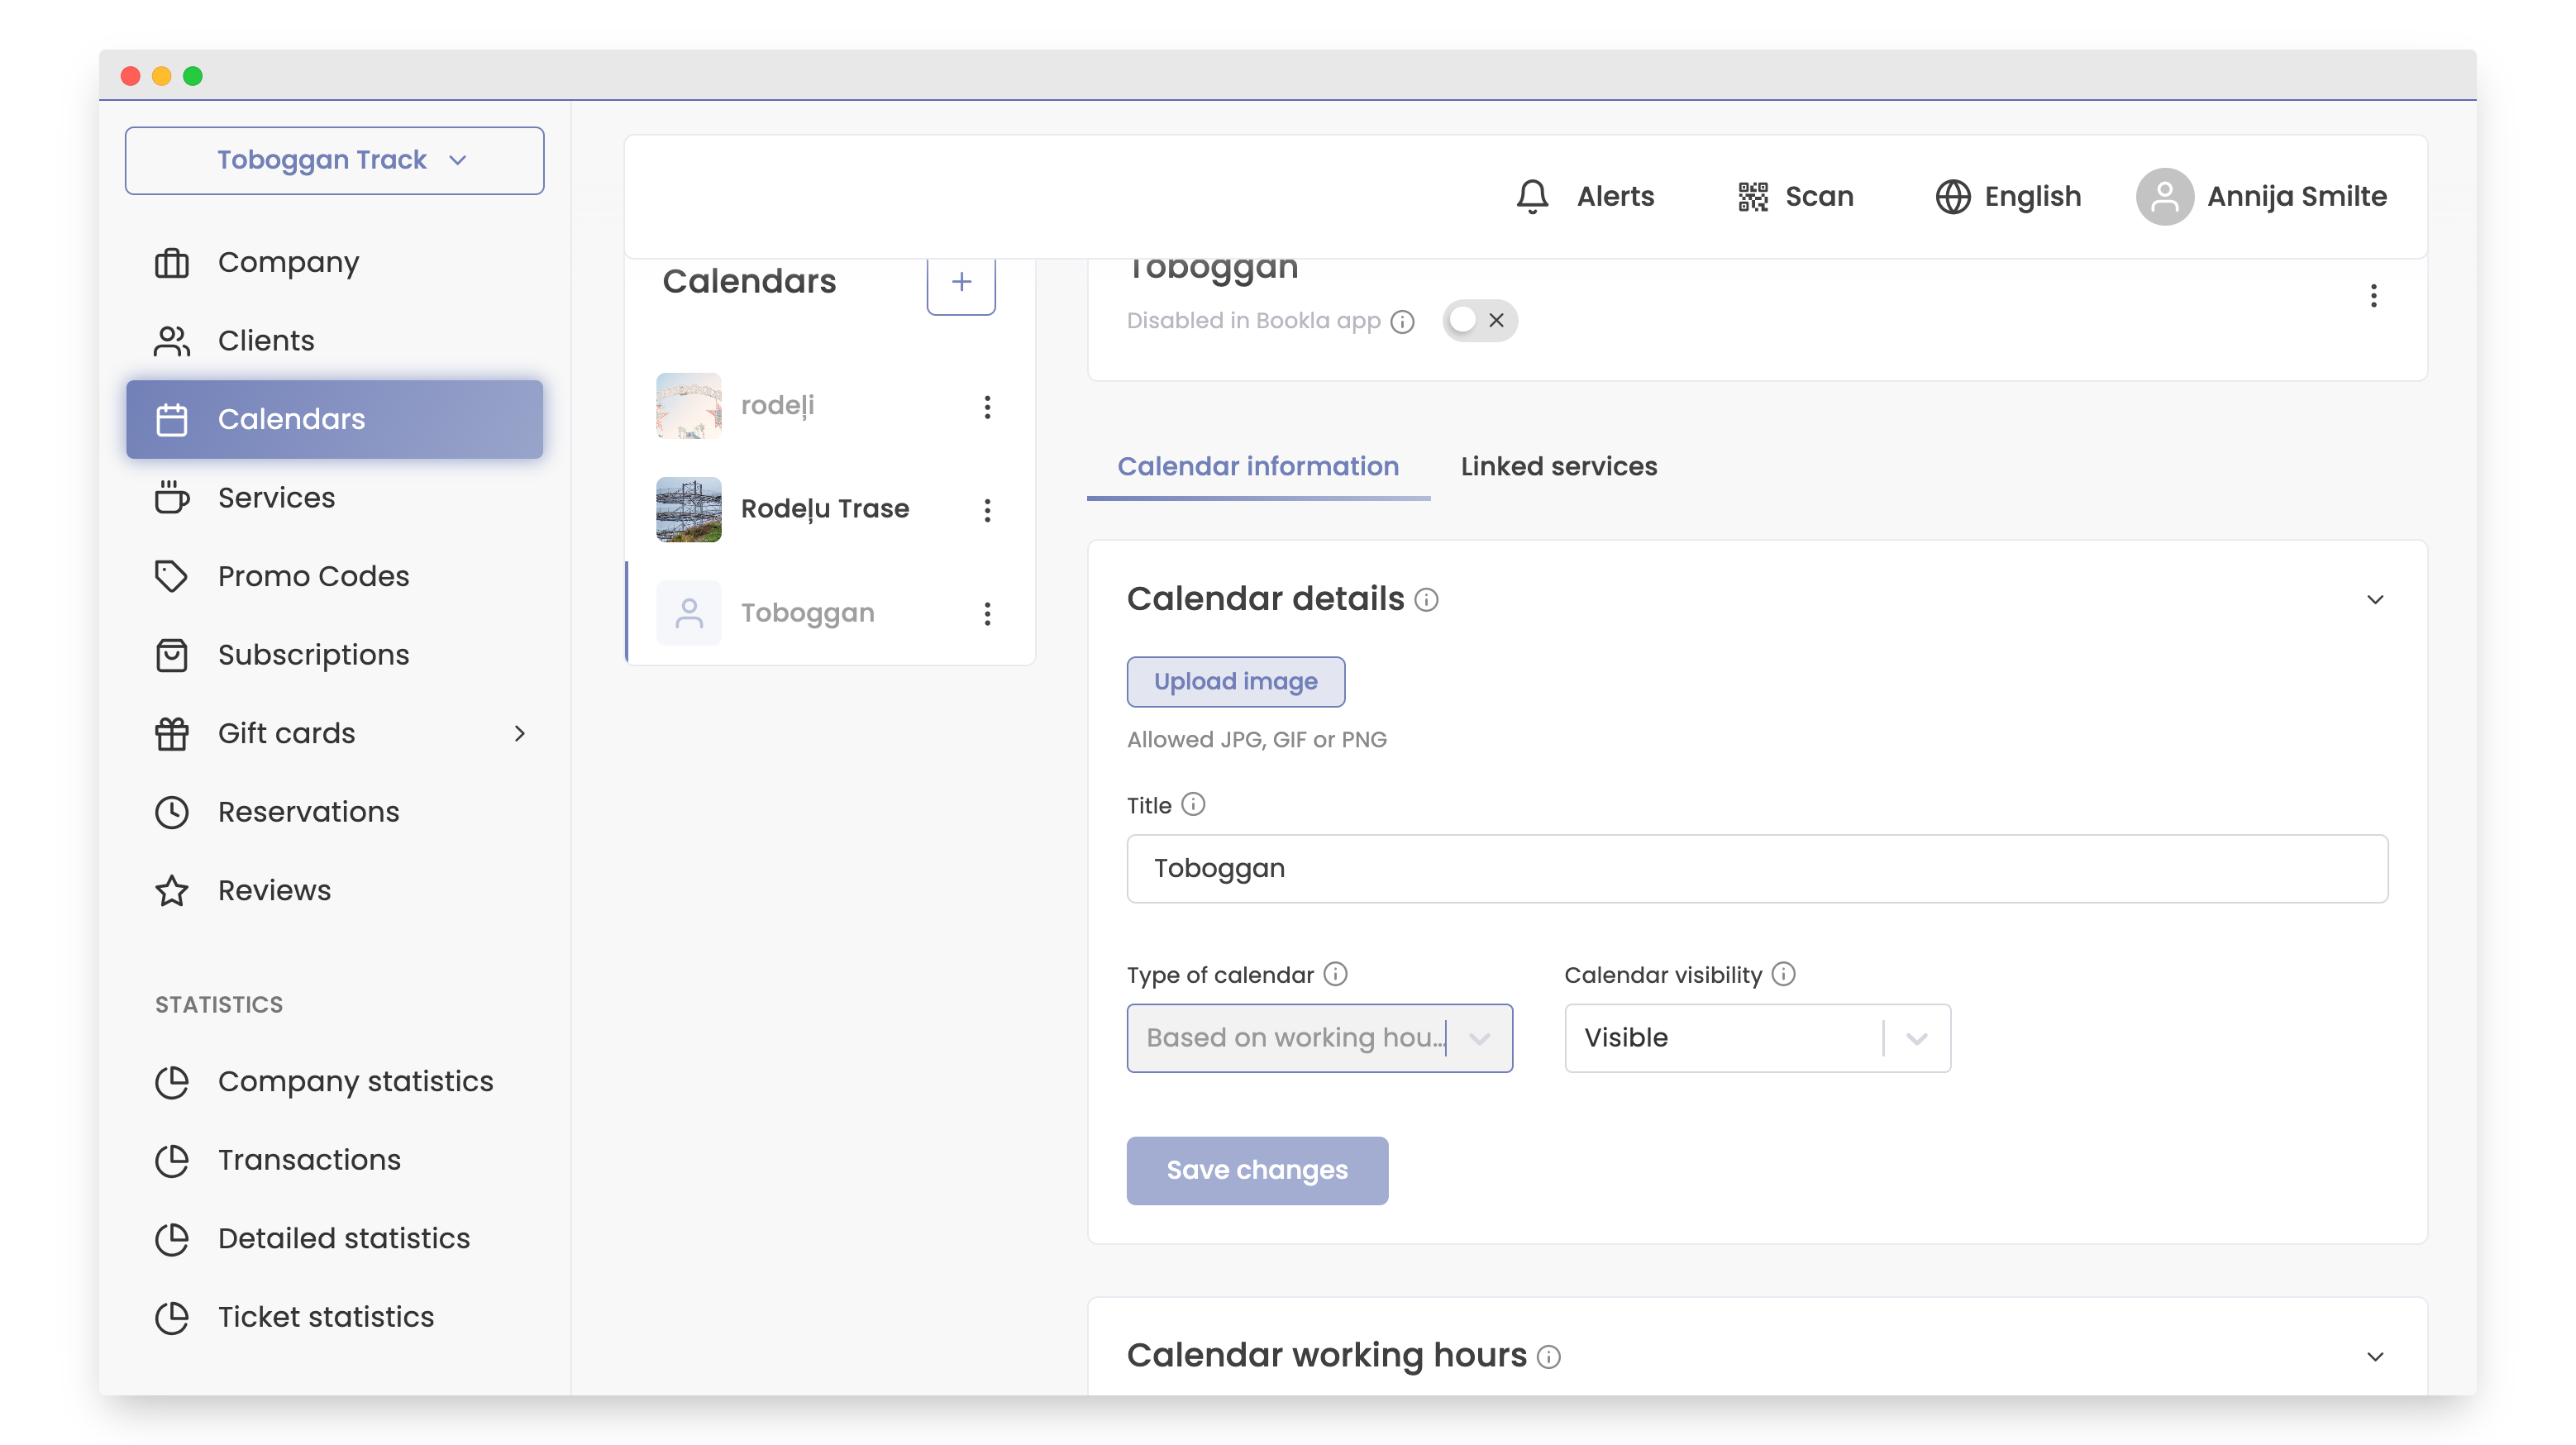
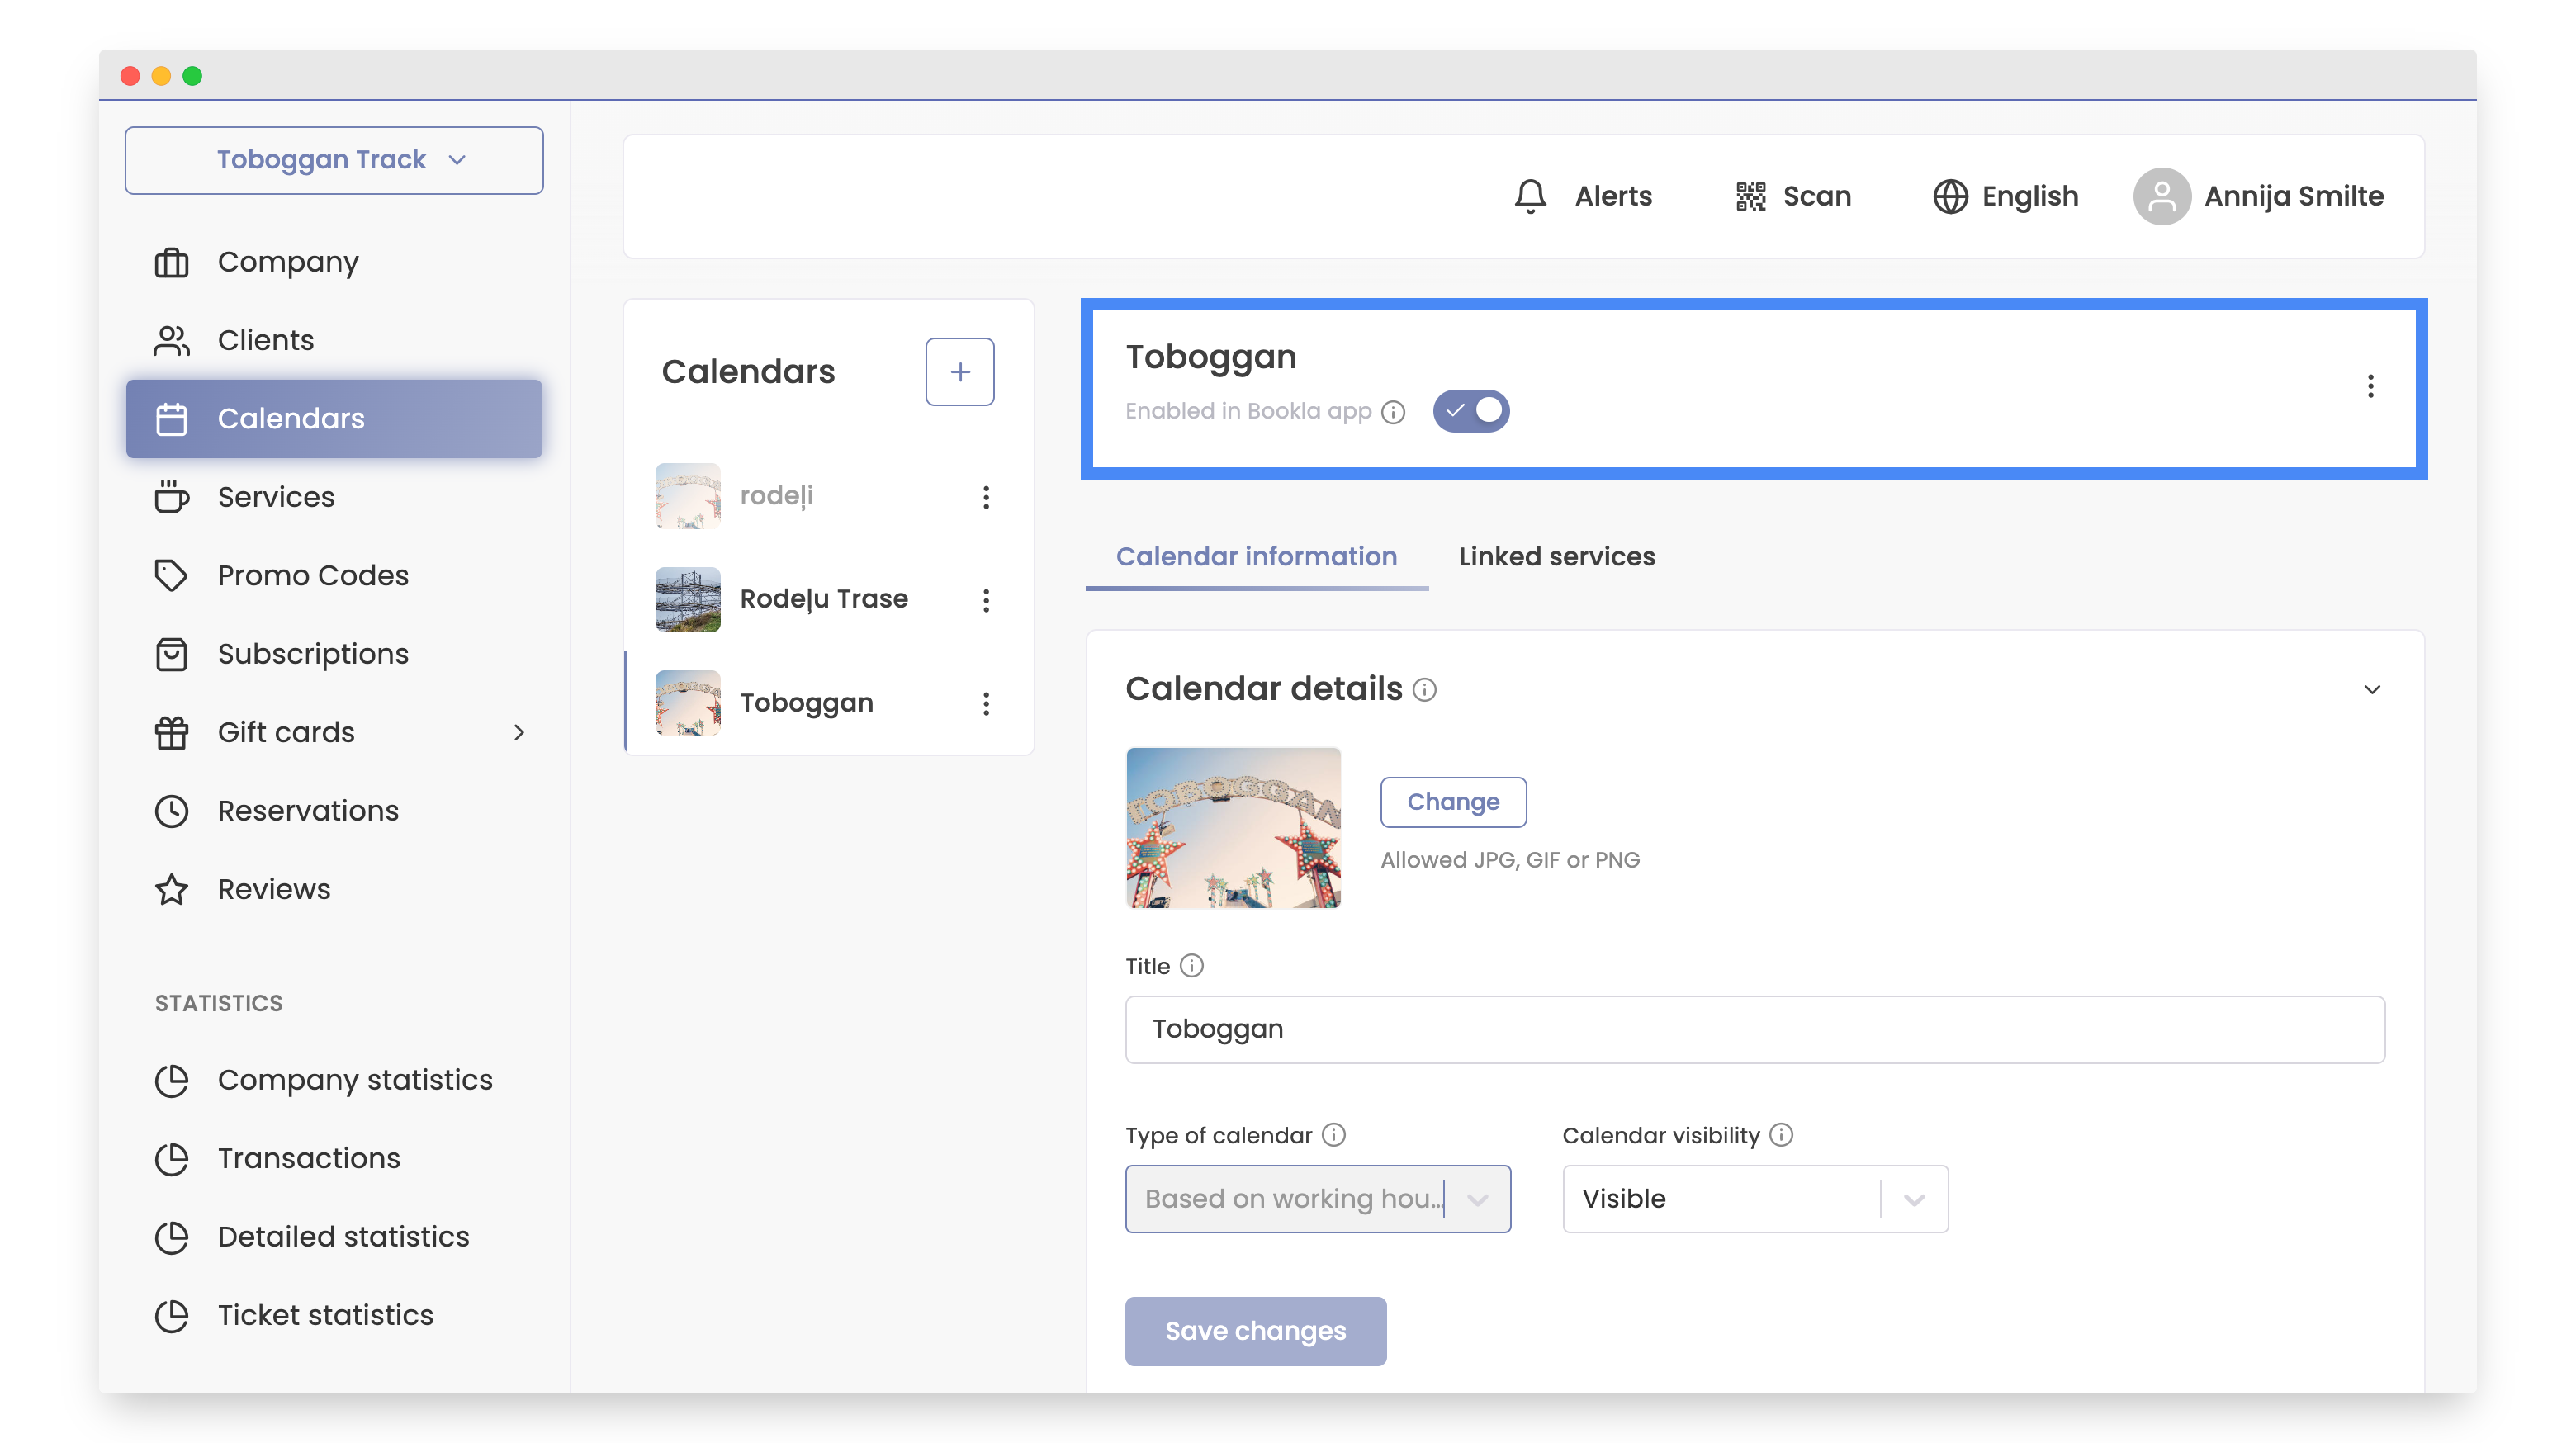
- Enter details about the calendar:
- Upload image: An image for the calendar is required for activation.
- Title: This will be visible to clients.
- Visibility: Choose whether the calendar will be visible or hidden. If hidden, clients won't see this calendar in the "About us" section, but they can continue making reservations in this calendar.
- Click "Save changes".
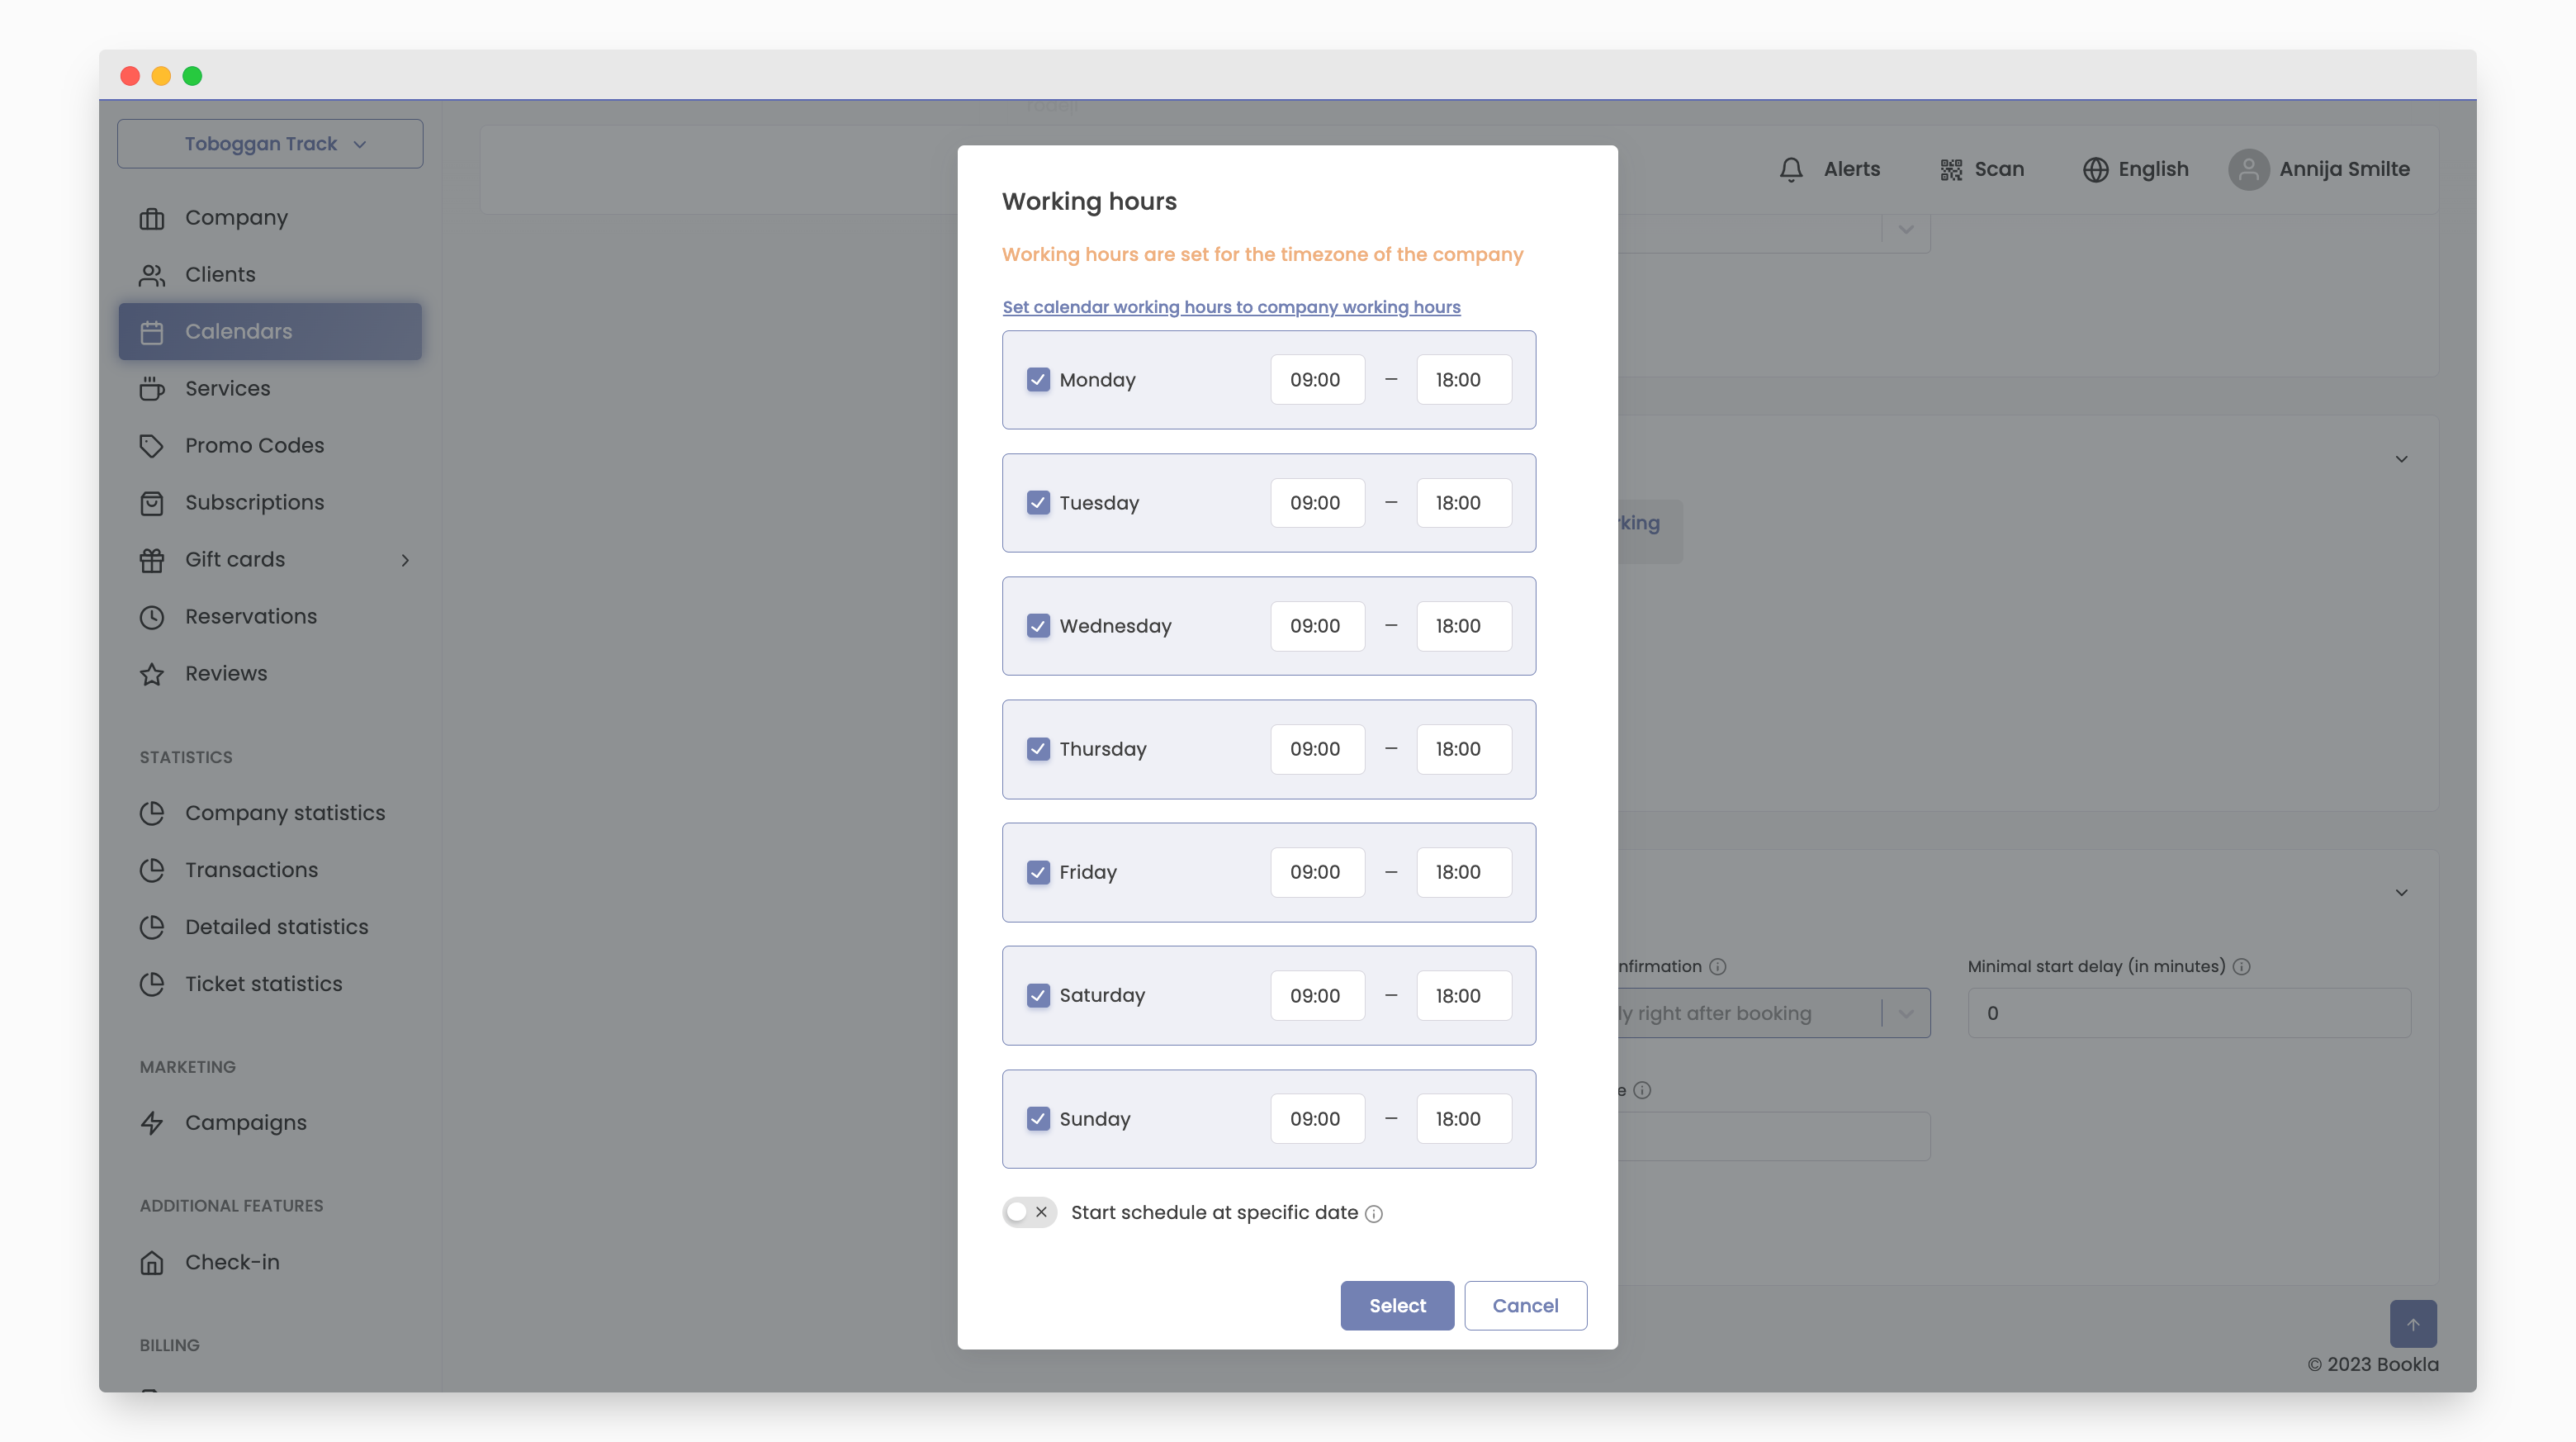
- If your calendar is based on working hours, scroll down to "Calendar Working Hours".
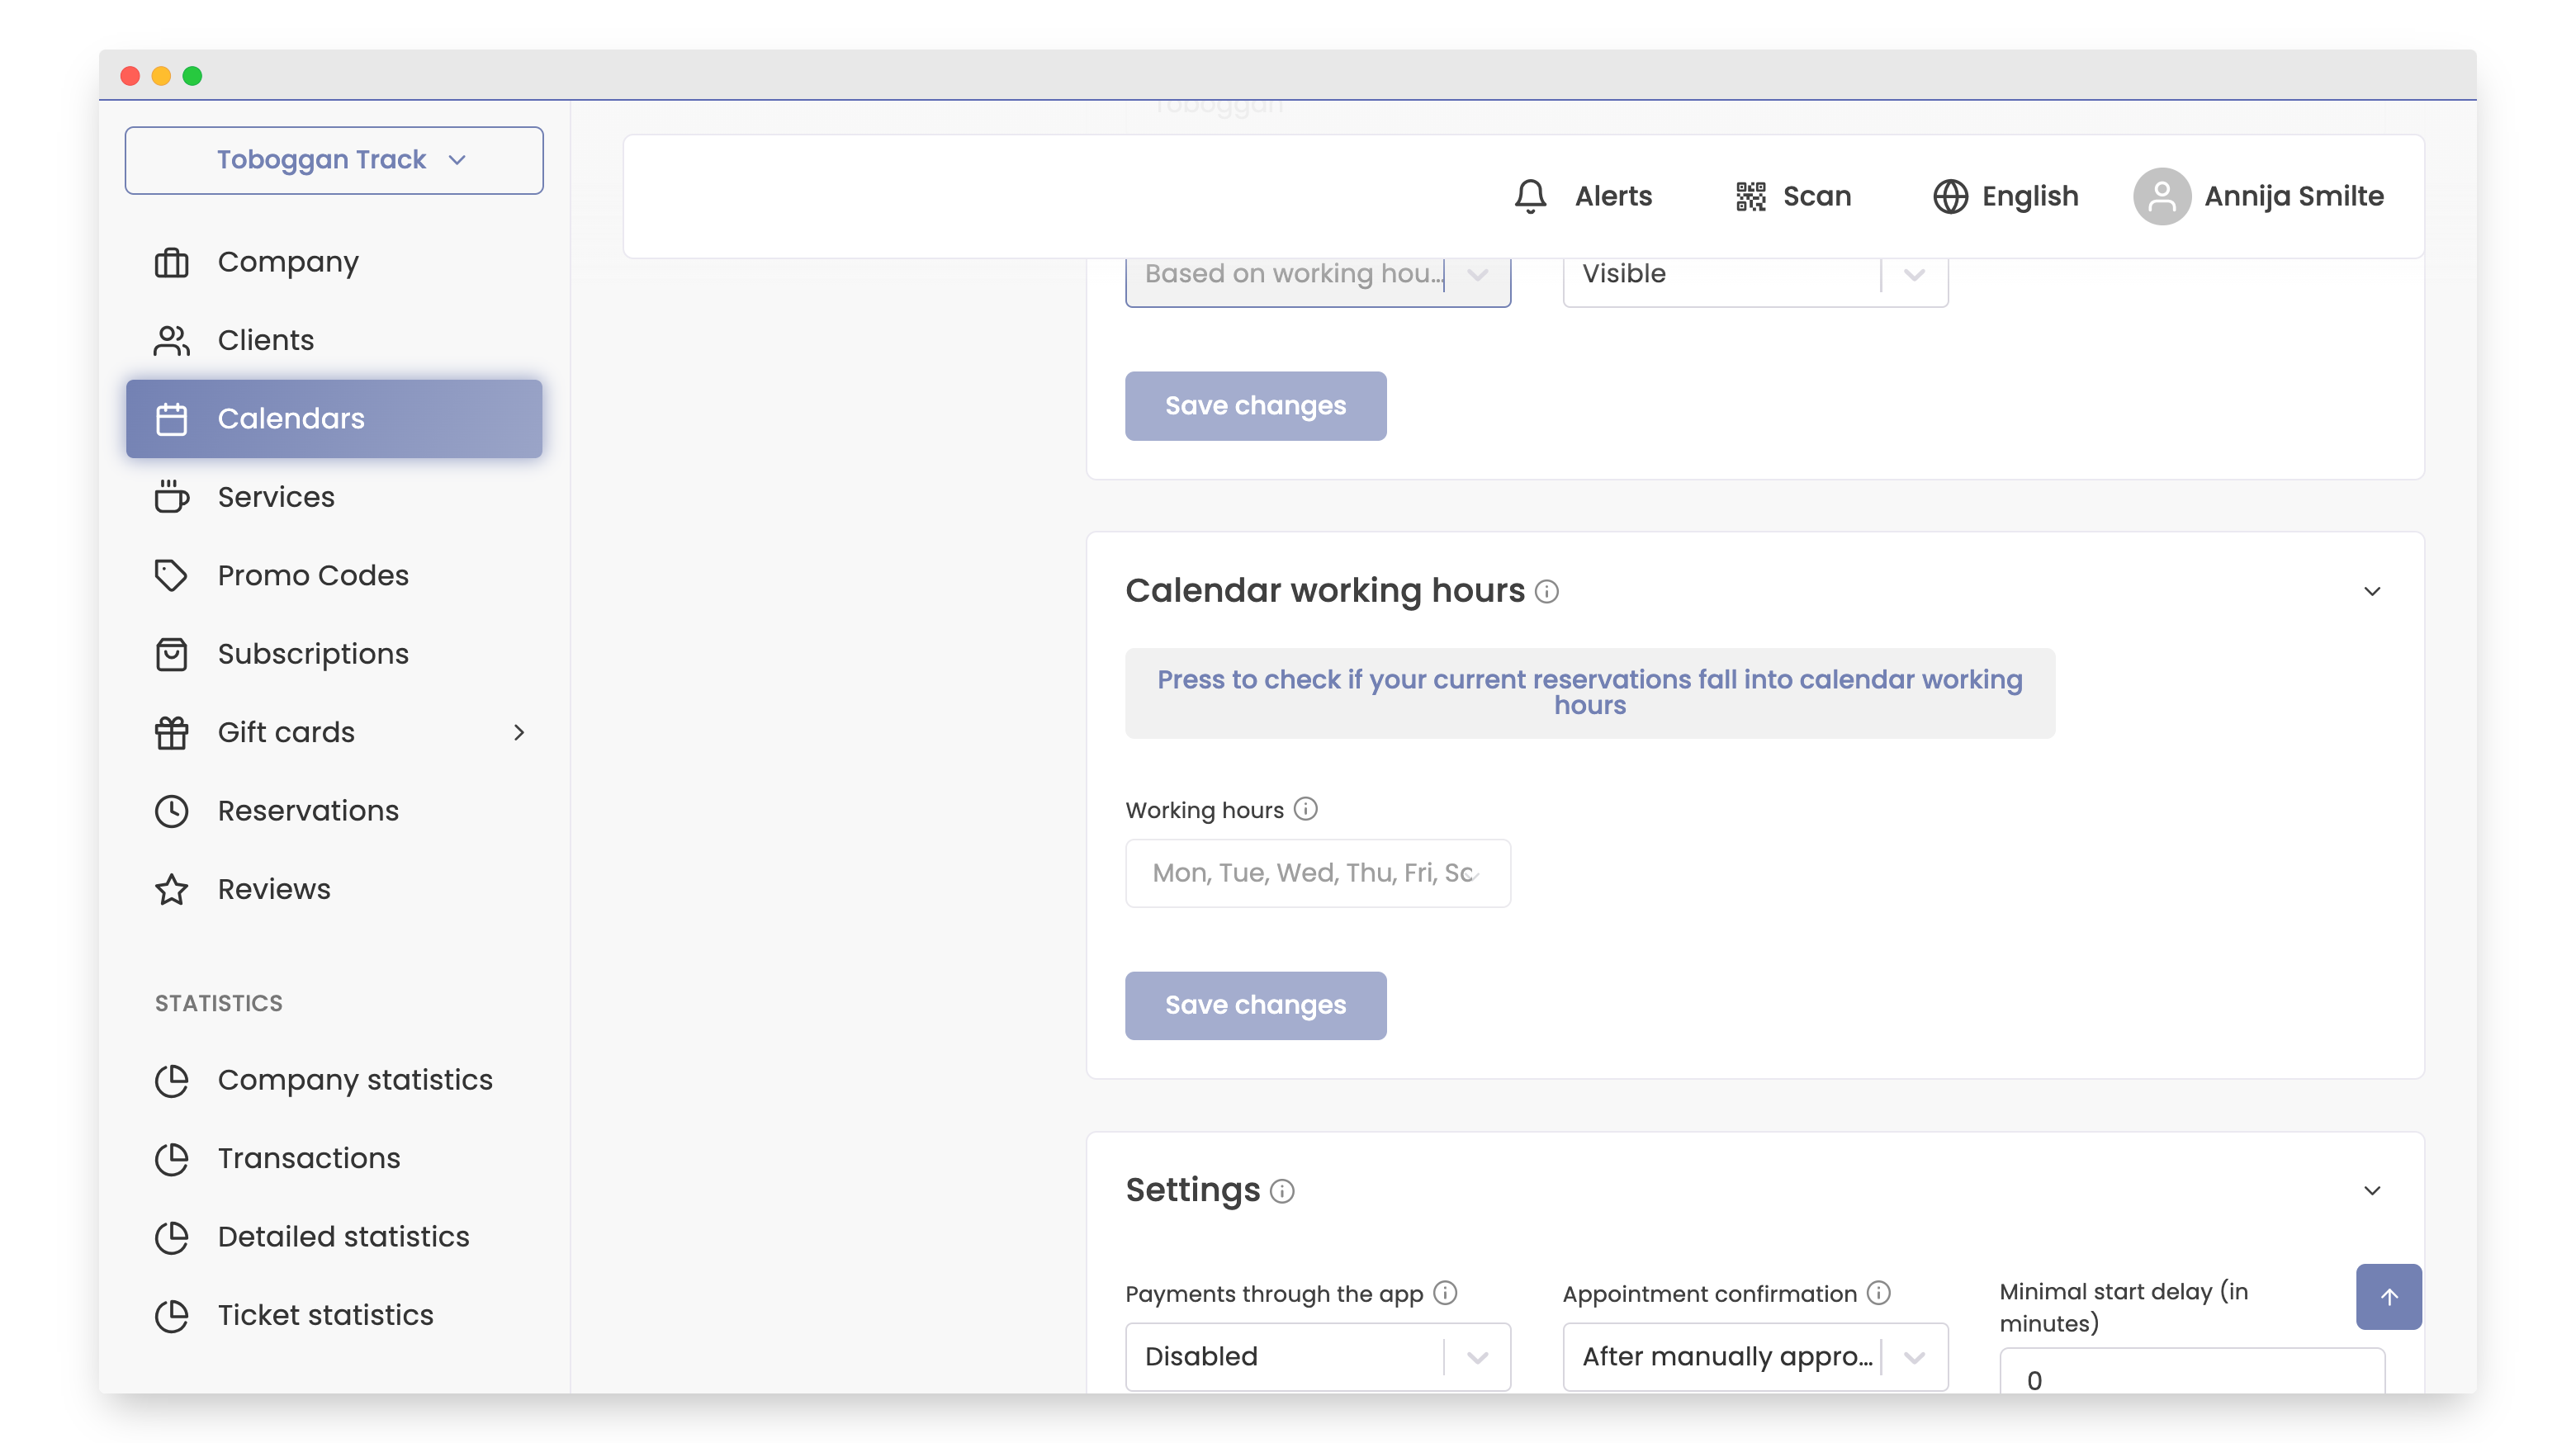
- Fill in the working hours details:
- Days: Specify the days when the calendar will be active.
- Working hours: Enter the working hours for each selected day.
- Start working schedule from a specific date: If you want to set a specific start date for reservations, it means clients cannot make reservations before this date.
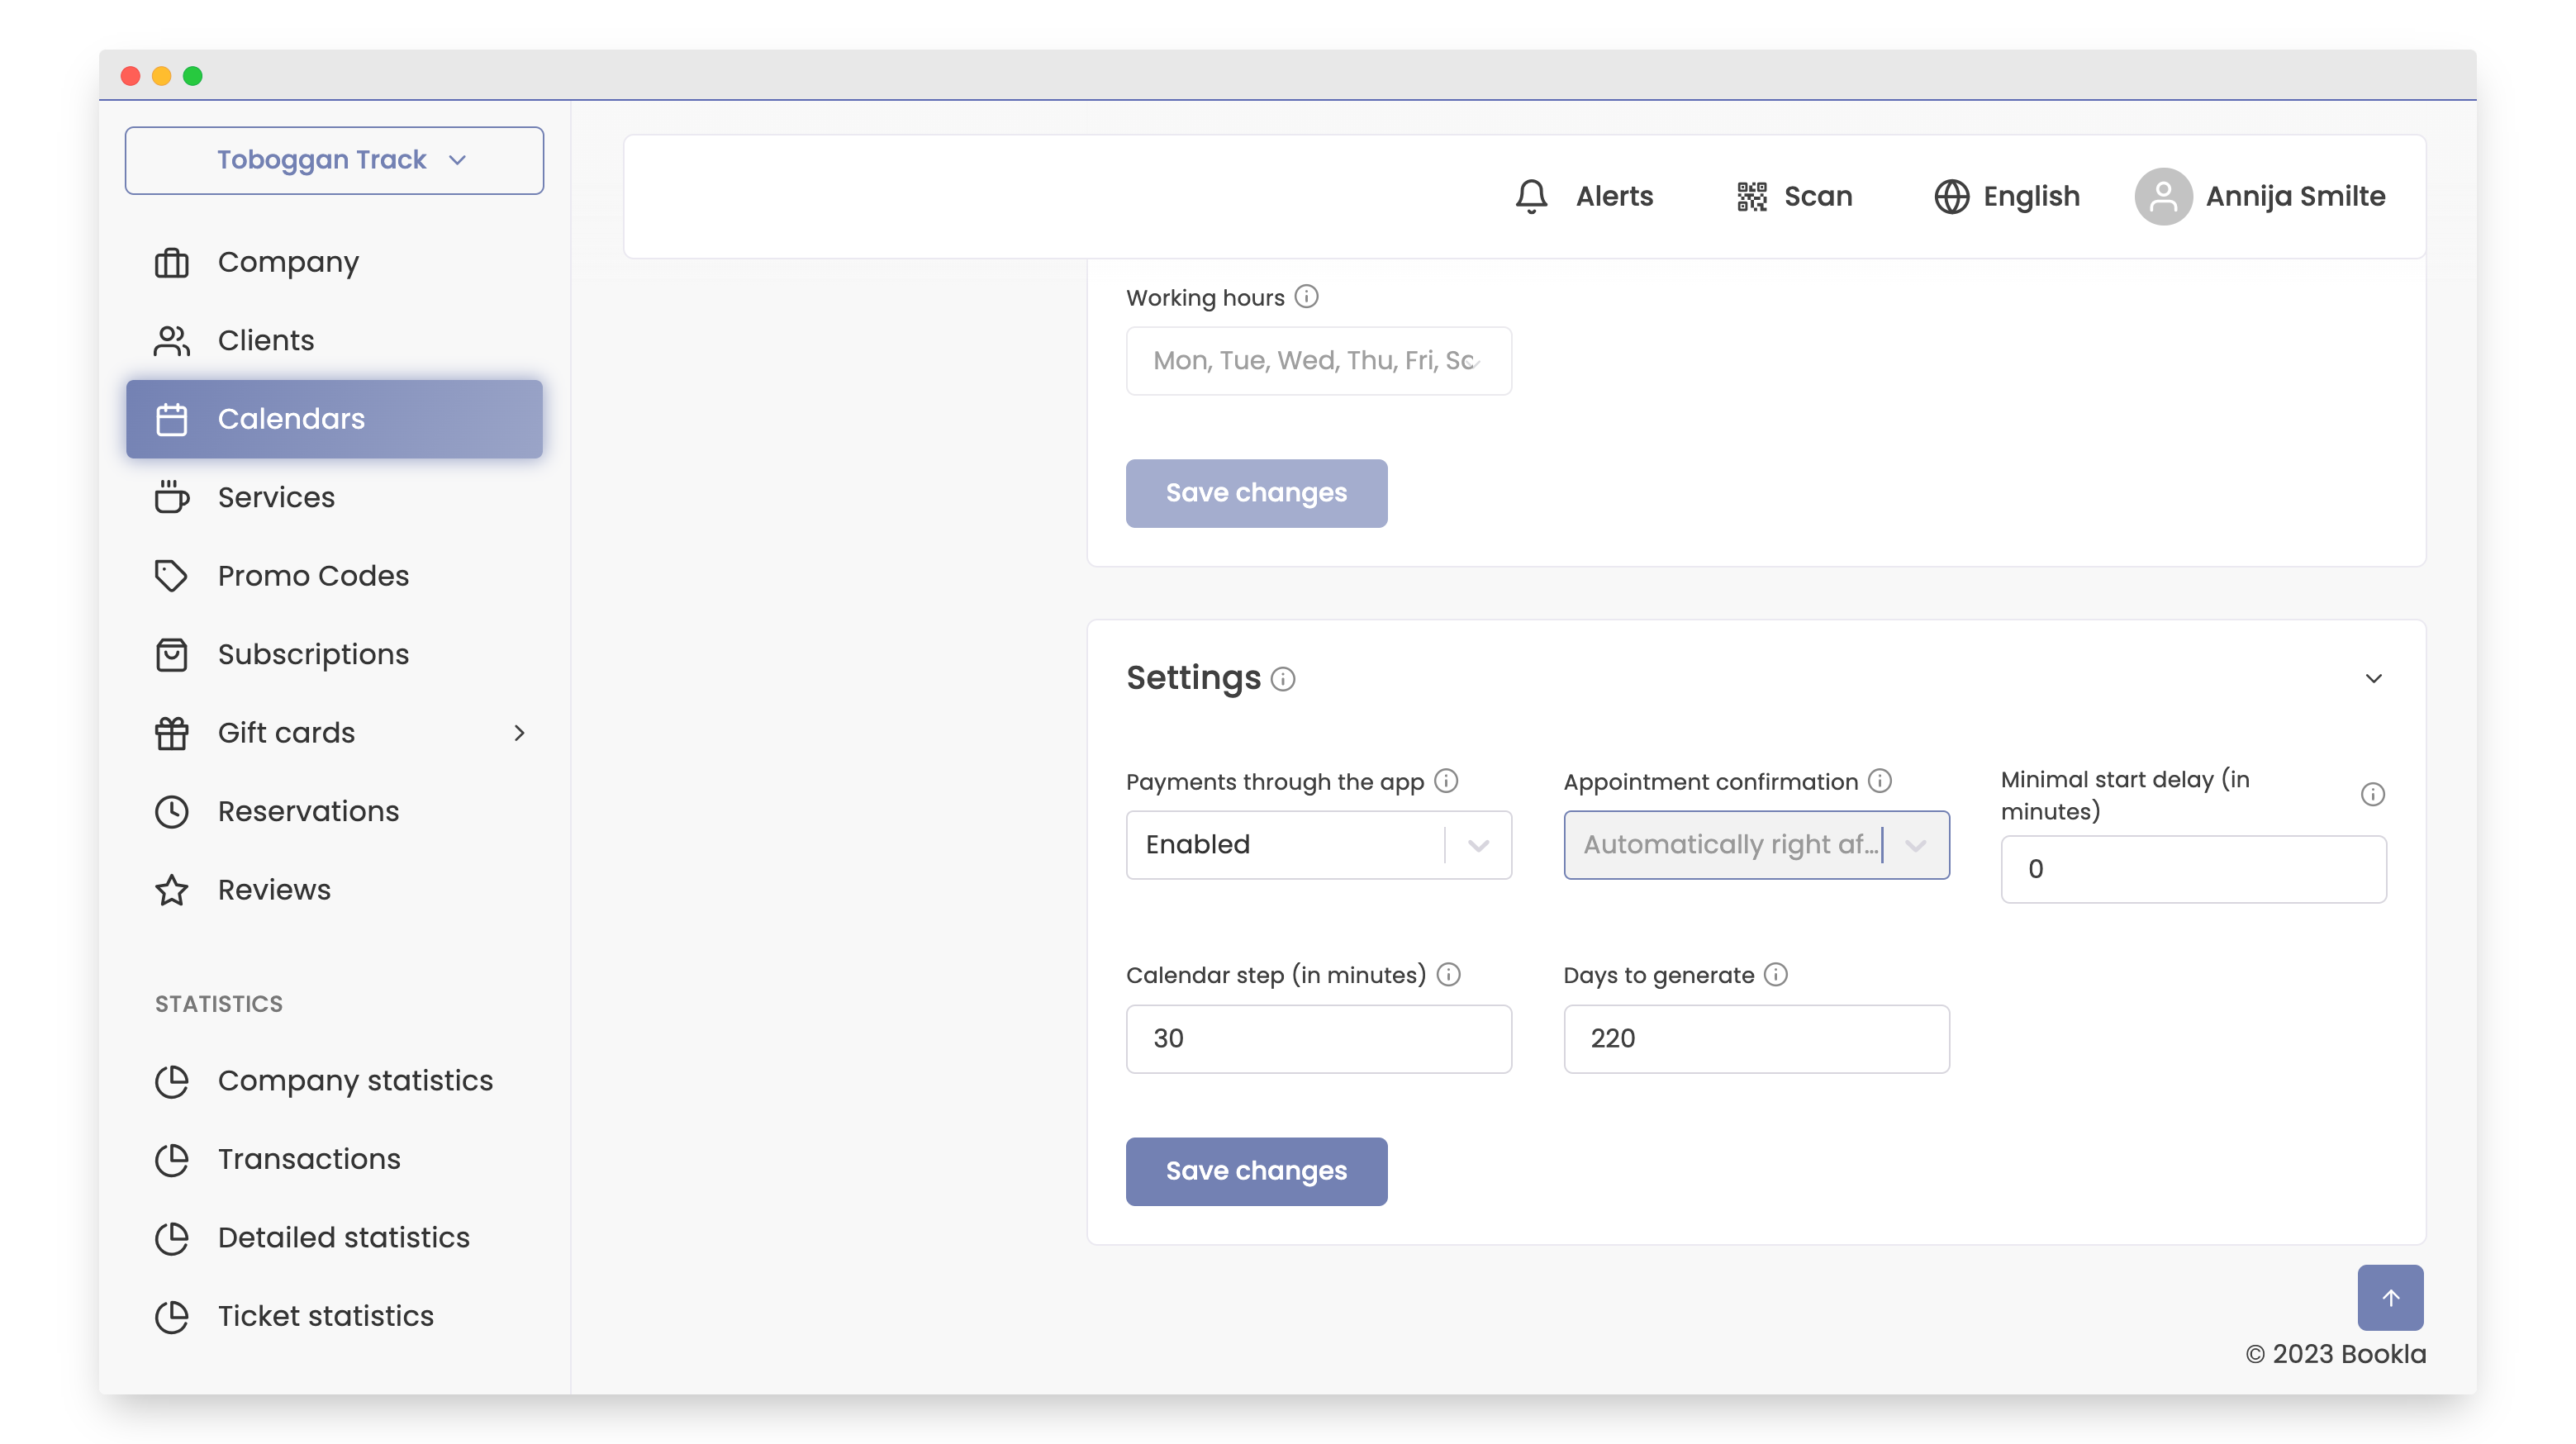
- Scroll down to "Settings" and fill in the following information:
-
Enable payment in the app - Online payments must be enabled to add them to the calendar.
-
Set minimum lead time (in minutes) - Clients cannot make reservations faster than the lead time.
-
Enter calendar step (in minutes) - Specify reservation intervals.
-
Specify how many days ahead you want to create this calendar. This way, all activities, reservations, and working hours will be created for the specified number of days in advance.
-
Click "Save changes".
- Scroll up and activate the calendar on the Bookla platform by clicking the button.
After completing these steps, calendar has been successfully created!